A Scout Rifle Is Made... Savage 340

Open forum for rifles.
User avatar
Ranch Dog
Site Admin
Site Admin
Posts: 6457
Joined: 22 Jun 2013 17:16
My Press Choice: Progressive
Location: Inez, TX
Has thanked: 1617 times
Been thanked: 2850 times

Re: A Scout Rifle Is Made... Savage 340

Post by Ranch Dog »

Thanks guys!

I installed the Burris Zee Signature rings. Took both a 10°offset for the rear ring & a 20°offset in the front ring to get it where I think it is right. Shooting will tell what is really needed. You can see the offsets inside the outer ring.

Image

The next picture is a bit cluttered but overall, the little scout is really coming together!

Image
Michael
Image
Steve
Founding Member & Supporter
Posts: 1099
Joined: 21 Jan 2014 20:57
My Press Choice: Progressive
Location: Eastern Iowa
Has thanked: 182 times
Been thanked: 357 times

Re: A Scout Rifle Is Made... Savage 340

Post by Steve »

I have used those Burris rings on a few rifles. They work great.
DaveInGA
250 Shots
250 Shots
Posts: 279
Joined: 18 Nov 2015 08:59
My Press Choice: Progressive
Location: Jefferson, GA
Has thanked: 91 times
Been thanked: 85 times

Re: A Scout Rifle Is Made... Savage 340

Post by DaveInGA »

Yep, those rings have saved me on a Romanian Model 69.
Steve
Founding Member & Supporter
Posts: 1099
Joined: 21 Jan 2014 20:57
My Press Choice: Progressive
Location: Eastern Iowa
Has thanked: 182 times
Been thanked: 357 times

Re: A Scout Rifle Is Made... Savage 340

Post by Steve »

Even if offset is not required they insure nonbinding alignment of the scope in the rings. I won't purchase any other type in the future.

http://www.burrisoptics.com/signature-rings
User avatar
Ranch Dog
Site Admin
Site Admin
Posts: 6457
Joined: 22 Jun 2013 17:16
My Press Choice: Progressive
Location: Inez, TX
Has thanked: 1617 times
Been thanked: 2850 times

Re: A Scout Rifle Is Made... Savage 340

Post by Ranch Dog »

I suspect some of tired of hearing about it but I just came in from shooting the little rifle and it is going real well. I was working on the offsets to correct the POA without the turret adjustments on the Weaver. Just about there. I'm going to need 20° front and back, the maximum the Burris Signature Inserts allow. That's fine and it will be zeroed. Part of the problem with the adjustment is that the rings are very close together on the mount, 3". The Burris correction chart doesn't cover that short of distance.

Still looking good. Just order another 20° insert from MidwayUSA, actually had to order the 5°, 10°, & 20° set as they are out of just the 20°. It's cheaper and they will be used someday.

Image

Image
Michael
Image
Steve
Founding Member & Supporter
Posts: 1099
Joined: 21 Jan 2014 20:57
My Press Choice: Progressive
Location: Eastern Iowa
Has thanked: 182 times
Been thanked: 357 times

Re: A Scout Rifle Is Made... Savage 340

Post by Steve »

Tell me about the cheek piece RD. I need one on my Henry.

Thanks
User avatar
akuser47
Moderator & Supporter
Posts: 1397
Joined: 30 Jun 2013 09:16
My Press Choice: Single Stage
Location: ohio
Has thanked: 666 times
Been thanked: 266 times

Re: A Scout Rifle Is Made... Savage 340

Post by akuser47 »

Looks sexy
Image
Live Free,Ride Free, Or Die Fighting, For The Right, To do So!
User avatar
Ranch Dog
Site Admin
Site Admin
Posts: 6457
Joined: 22 Jun 2013 17:16
My Press Choice: Progressive
Location: Inez, TX
Has thanked: 1617 times
Been thanked: 2850 times

Re: A Scout Rifle Is Made... Savage 340

Post by Ranch Dog »

Steve wrote:Tell me about the cheek piece RD. I need one on my Henry.
It's a God' A Grip! The particular model on the rifle is the LSRCP. I use these on a number of rifles. I had this one on a Rossi Single Shot I just sold. I slowly peeled it off and it stuck right on this rifle as tight as a drum!
Michael
Image
DaveInGA
250 Shots
250 Shots
Posts: 279
Joined: 18 Nov 2015 08:59
My Press Choice: Progressive
Location: Jefferson, GA
Has thanked: 91 times
Been thanked: 85 times

Re: A Scout Rifle Is Made... Savage 340

Post by DaveInGA »

Ranch Dog wrote:
Steve wrote:Tell me about the cheek piece RD. I need one on my Henry.
It's a God' A Grip! The particular model on the rifle is the LSRCP. I use these on a number of rifles. I had this one on a Rossi Single Shot I just sold. I slowly peeled it off and it stuck right on this rifle as tight as a drum!
Those things look like they're the cat's meow! I'm going to have to have one on these Hi Point Carbines I just got and may be a couple other rifles. A plus is the sticky on it is good and held up to moving it to another rifle.

What made you get rid of the Rossi?
DaveInGA
250 Shots
250 Shots
Posts: 279
Joined: 18 Nov 2015 08:59
My Press Choice: Progressive
Location: Jefferson, GA
Has thanked: 91 times
Been thanked: 85 times

Re: A Scout Rifle Is Made... Savage 340

Post by DaveInGA »

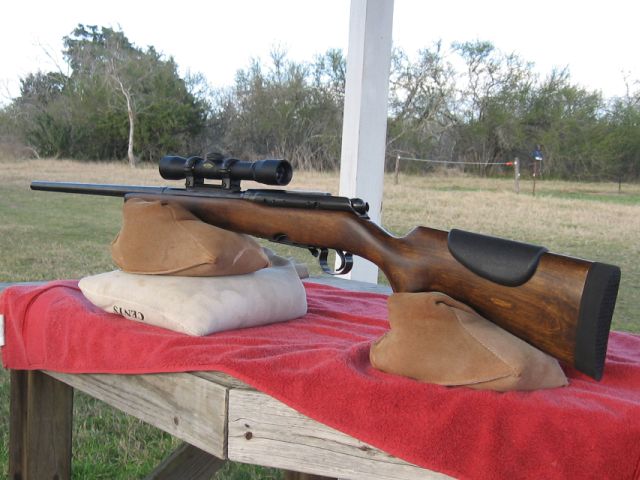
Ranch Dog wrote:Made real good progress on this project last night & this morning with the addition of a Pachmayer 750 Decelerator Pad. This added an inch of pull to the length which I really needed. This is the first grind to fit pad I've installed and it went like I was a Pro!

The holes on this stock were really wallowed out so I did it like it is supposed to be done. I drilled them out big time and filled the holes with 3/8" hardwood dowels that I cut off after they dried in place.

Image

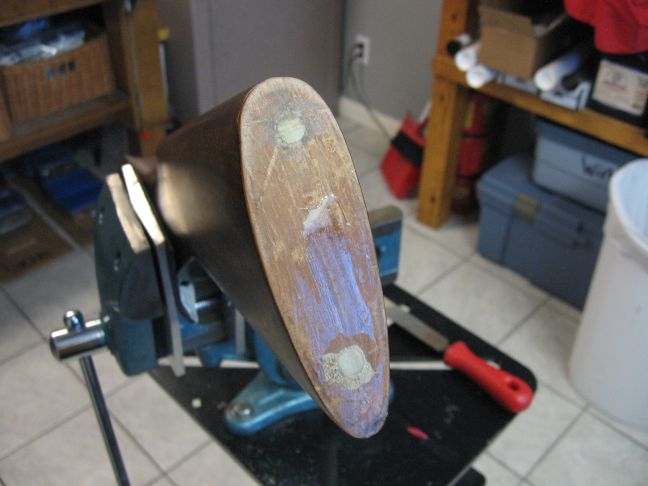
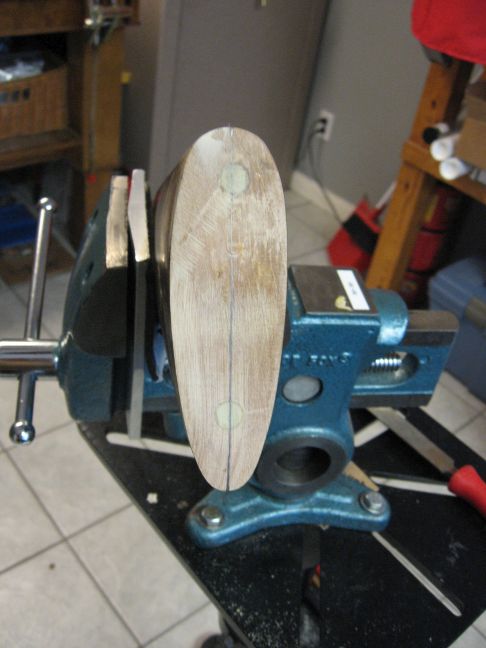
The base of the stock was not cut square but I did not want to cut anymore off the stock as the optimal length of pull for me is 15.25". I do not have the big grinding wheels and belts that a gunsmith would use, only a simple 1"X30" belt sander from Harbor Freight that I paid about $25 for once I finished handing them coupons!

Image

To square the very butt of the stock up, I pulled off the safety shield off the top of the sander and just backed the stock into the belt holding it square to the belt until it was true. Worked like a champ and only took a few minutes at the most!

Image

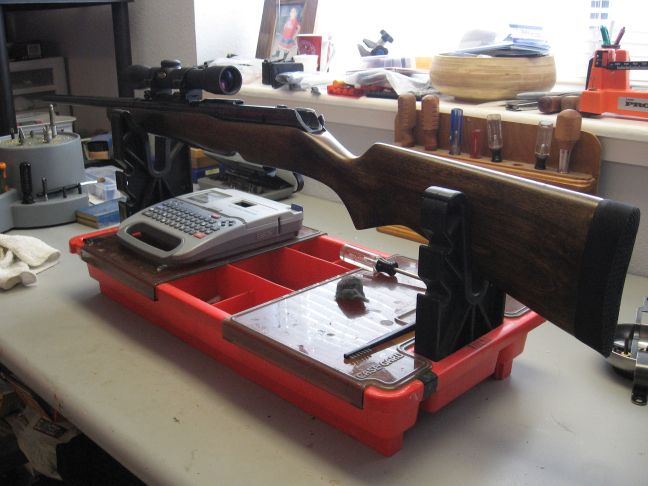
I do have the Pachmayr Recoil Pad Grinding Templates and the Miles Gilbert Recoil Pad Installation Fixture. The templates make lining up the holes and centering the pad a breeze. As this was my first use of the Installation Fixture, it took me awhile to get comfortable with setting it up as once you start grinding you are committed. The old measure a couple of times to cut once.

Image

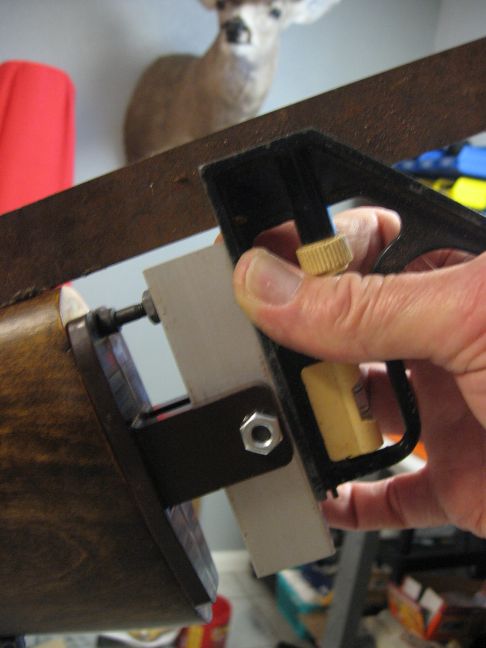
With the comb and bottom line of the stock set on the Installation Fixture I went right to work. The "Small" Pachmayr 750 is really large on the small stock of the 340 but it grinds quite a bit faster than you would think. The belt sander had an 80 grit belt and the finish on the pad was as smooth as it gets!

Besides the setup instructions, I did follow the advice Mr. Potter gave in a MidwayUSA video on using the tool. The best advice was concerning the use of a scribe line in the pad and then filing a stick of chalk over the pad and wiping the chalk dust off the pad. The scribe line really stands out and you grind right up to the line. It was perfect advice!

Image

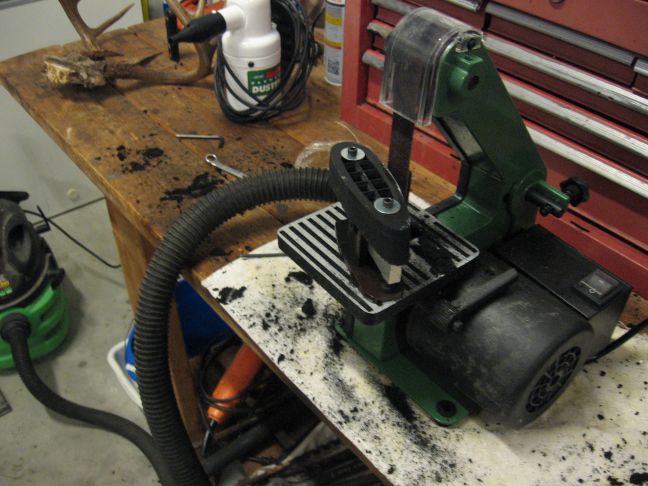
The belt sander worked like a charm. It has a vacuum port that kept the debris to a minimum, not like I saw in the video.

Image

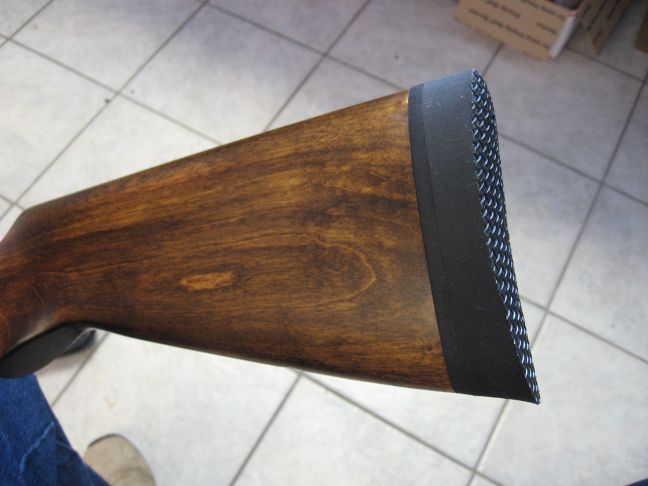
Here it is as pretty as can be!

Image

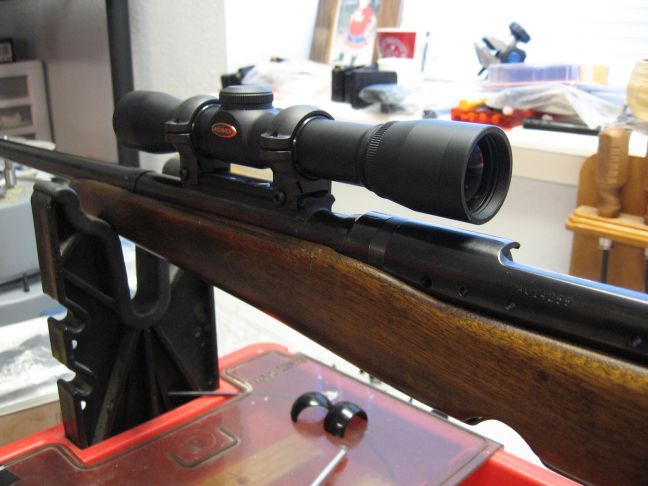
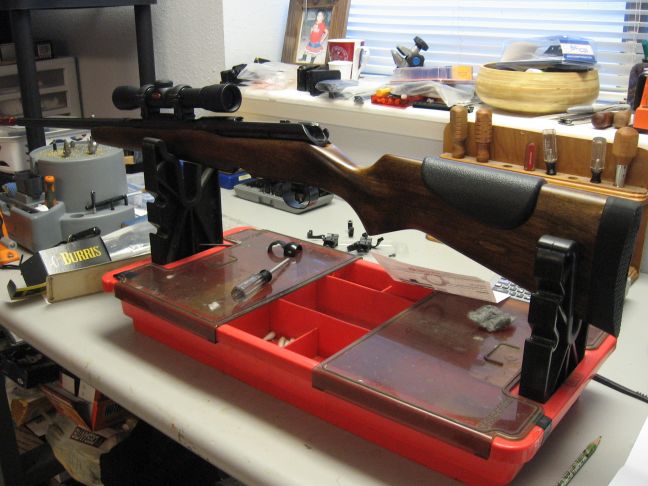
My scope rings came in today's mail so I'm going to work on that now. The Numrich order has been held up due to the weather but I will be ready to go once it is here!
How the heck did I miss these? These are finer than frog hairs! That pad installation could not have gone any better. Great job RD!
Post Reply

Return to “Rifle Discussions”